
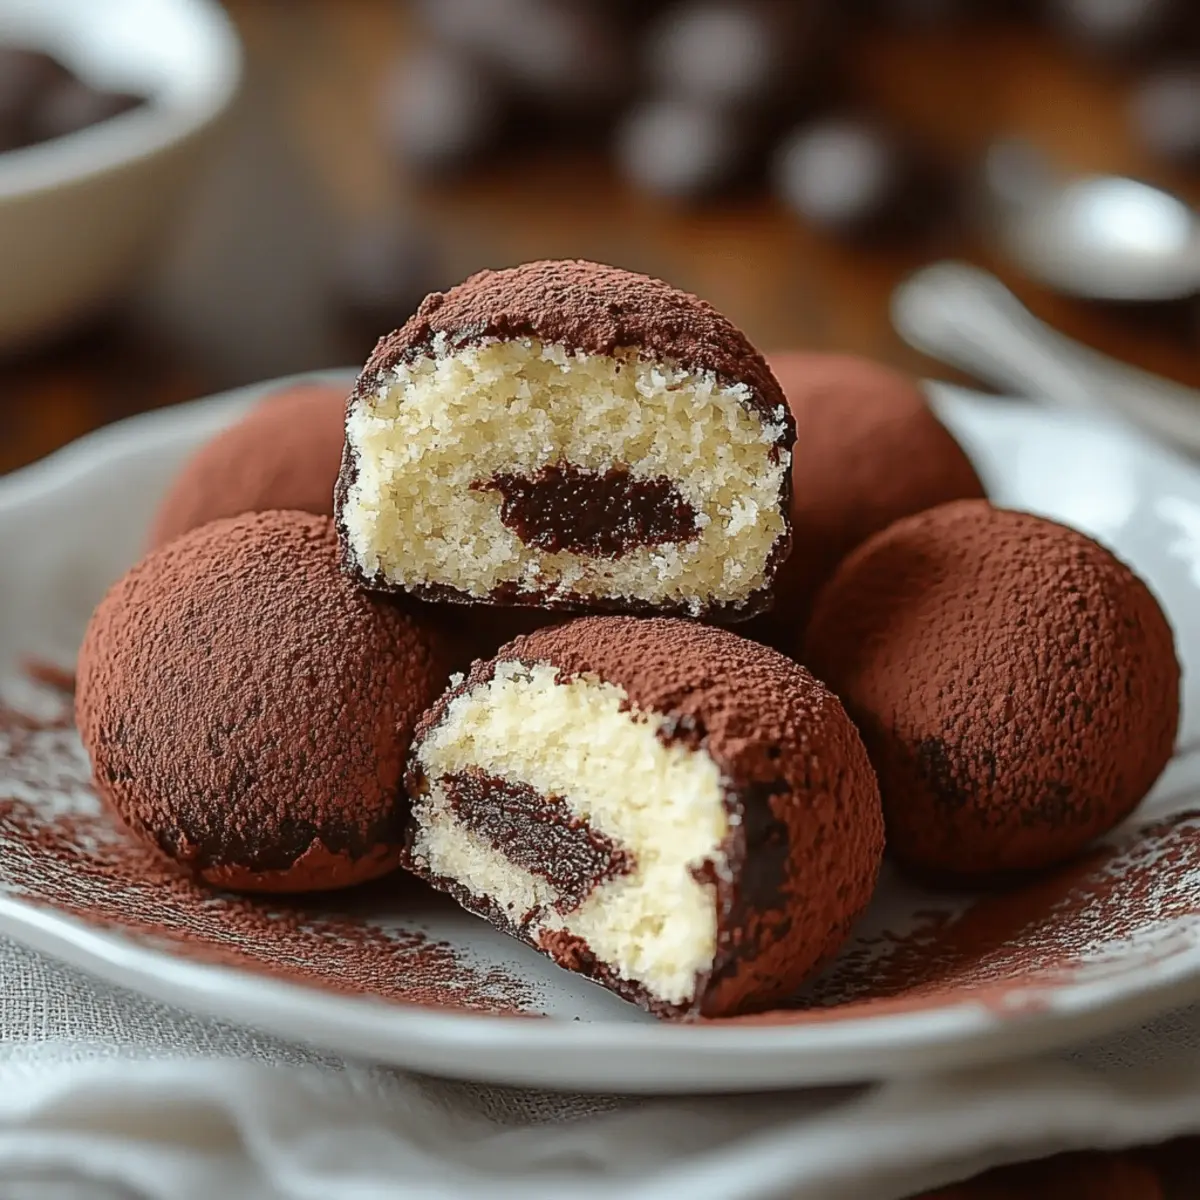
Taking a break from the hustle and bustle of everyday life to create something sweet can be a game-changer. That's where these delightful Tiramisu Balls come in—a quick and easy no-bake dessert that's perfect for satisfying your sweet tooth without fussing over complicated recipes. The creamy mascarpone, coffee-soaked ladyfingers, and the slightest hint of cocoa harmonize beautifully to deliver that classic tiramisu taste in a fun, bite-sized form. Not only are these Tiramisu Balls a conversation starter for your summer gatherings, but they also allow you to indulge in a moment of joy without the lengthy prep time. Curious about how to make these delectable treats? Let’s dive in!
Why are Tiramisu Balls so special?
Easy Preparation: This no-bake recipe brings simplicity right to your kitchen, perfect for both novice cooks and seasoned chefs.
Decadent Flavor: The rich mascarpone and coffee-laden ladyfingers create that beloved tiramisu flavor, with every bite bursting with indulgence.
Versatile Treat: Enjoy them as a party snack, after-dinner treat, or even a sweet pick-me-up during the day, effortlessly pleasing all palates!
Quick Chill Time: With just an hour in the refrigerator, you can quickly whip up these delights for last-minute gatherings or unexpected guests.
Make Ahead: Tiramisu Balls can be prepared in advance, stored in an airtight container, and enjoyed for days—perfect for busy schedules!
These little bites of joy are totally customizable. If you're interested in experimenting, try a kid-friendly version by using chocolate milk instead of coffee.
Tiramisu Balls Ingredients
• A delightful combination of flavors takes these Tiramisu Balls to the next level!
For the Filling
- Mascarpone Cheese (250g) – Provides a rich, creamy base; ensure it’s at room temperature for easy mixing.
- Heavy Cream (150ml) – Adds volume and lightness; whipped to stiff peaks for a fluffy texture.
- Powdered Sugar (50g) – Sweetens the mixture; sift for smooth integration without lumps.
- Vanilla Extract (1 tsp) – Enhances flavor depth; always use pure extract for the best taste.
- Salt (Pinch) – Balances sweetness; brings out the flavors beautifully.
For Assembly
- Ladyfingers (150g) – Traditional base for tiramisu; soak briefly in coffee for moisture. Substitute with sponge cake if needed.
- Strong Brewed Coffee (1 cup) – Infuses the dessert with classic tiramisu flavor; cool completely before using.
- Coffee Liqueur (2 tbsp, optional) – Adds a depth of flavor; can be omitted for a kid-friendly version.
For the Finish
- Cocoa Powder (2 tbsp) – Dust to finish; adds a slightly bitter contrast to the sweetness.
- Chocolate Shavings or Grated Chocolate (optional) – Garnish for extra visual appeal and chocolate goodness.
These Tiramisu Balls truly embody the classic flavors in a fun and easy-to-enjoy way!
Step‑by‑Step Instructions for Tiramisu Balls
Step 1: Whip Cream
Start by pouring the heavy cream into a chilled mixing bowl. Using a hand mixer, whip the cream on medium-high speed for about 3 to 5 minutes, or until stiff peaks form. The cream should be thick and hold its shape. This light, fluffy texture will give your Tiramisu Balls a delightful creaminess.
Step 2: Mix Cheese and Sugar
In a separate bowl, combine the room temperature mascarpone cheese with the sifted powdered sugar. Using a spatula or whisk, blend these together until the mixture is completely smooth and creamy. This step will ensure that your Tiramisu Balls have the rich flavor that balances beautifully with the whipped cream.
Step 3: Incorporate Vanilla and Salt
Now, add the vanilla extract and a pinch of salt to the mascarpone mixture. Mix well until everything is thoroughly incorporated. The vanilla will enhance the overall flavor, while the salt will help to highlight the sweetness of your Tiramisu Balls, creating a balanced and rich base for the dessert.
Step 4: Fold in Whipped Cream
Gently fold the whipped cream into the mascarpone mixture in three parts, using a spatula to avoid deflating the whipped cream. This light folding technique ensures your Tiramisu Balls maintain that airy texture. Keep folding until the mixture is uniformly blended and no white streaks remain visible.
Step 5: Chill Mixture
Cover the combined mascarpone and whipped cream mixture with plastic wrap and refrigerate it for at least 30 minutes. This chilling step allows the flavors to meld together beautifully and thickens the mixture slightly, making it easier to form the Tiramisu Balls later.
Step 6: Brew Coffee
While the cream mixture chills, brew a strong cup of coffee and set it aside to cool completely. You want the coffee to be at room temperature to prevent the ladyfingers from becoming too soggy when dipped. This step is crucial for achieving an authentic tiramisu flavor in your Tiramisu Balls.
Step 7: (Optional) Add Liqueur
If desired, stir in two tablespoons of coffee liqueur to the cooled coffee. This optional step adds an extra depth of flavor to your Tiramisu Balls. However, you can skip this step if you prefer a non-alcoholic version, which is great for kids or those avoiding alcohol.
Step 8: Dip Ladyfingers
Quickly dip each ladyfinger into the cooled coffee mixture, ensuring they are soaked but not soggy. A brief dip of just a second or two is sufficient to infuse them with coffee flavor while keeping their structure intact. Place the dipped ladyfingers on a clean cutting board or plate.
Step 9: Crush Ladyfingers
Using a food processor or a ziplock bag, finely crush the soaked ladyfingers into a crumbly texture. This mixture will become a vital component for forming your Tiramisu Balls. If using a bag, seal it tightly and use a rolling pin to crush them effectively, ensuring there are no large pieces.
Step 10: Combine Mixtures
Add the crushed ladyfingers to your chilled mascarpone cream. Gently fold them in until the mixture is well combined, making sure the ladyfinger crumbs are evenly distributed throughout. The combination of these ingredients creates the signature flavor and texture of the Tiramisu Balls.
Step 11: Chill Again
Cover the combined mixture and return it to the refrigerator for at least 1 hour. This additional chilling time helps it firm up, making it easier to scoop and shape into balls later. The mixture should be thick and easier to handle when ready.
Step 12: Shape Balls
Once the mixture has chilled, use a small scoop or your hands to portion out the mixture, rolling each into 1-inch balls. Place them on a parchment-lined tray. The Tiramisu Balls should be well-formed, maintaining a smooth surface for the final presentation.
Step 13: Dust with Cocoa
Roll each ball in cocoa powder until they are fully coated. This final dusting of cocoa gives your Tiramisu Balls a classic look and adds a slight bitterness that perfectly balances the sweetness of the filling. Set them back on the parchment-lined tray.
Step 14: Garnish (Optional)
If desired, top each Tiramisu Ball with chocolate shavings or grated chocolate for an extra touch of indulgence. This optional garnish will add a delightful visual appeal and enhance the chocolate flavor in each bite of your Tiramisu Balls.
Step 15: Final Chill
Refrigerate the Tiramisu Balls for at least another 30 minutes before serving. This final chilling step will help them firm up nicely, making them perfect for enjoying at your next gathering. Serve them cold for the best texture and flavor experience!
Make Ahead Options
These Tiramisu Balls are a fantastic dessert to prepare in advance, saving valuable time during busy weeks or social gatherings! You can make the filling—combining mascarpone, whipped cream, and crushed ladyfingers—up to 24 hours ahead. After shaping the balls, store them in an airtight container in the refrigerator. To maintain their delightful texture, ensure they are dusted with cocoa powder right before serving. This way, they will remain fresh and just as delicious, allowing you to impress your guests with minimal last-minute fuss. When ready to enjoy, simply pull them from the fridge, and you’ll have a quick, restaurant-quality treat at your fingertips!
Expert Tips for Tiramisu Balls
-
Room Temperature Cheese: Ensure mascarpone is at room temperature for easy mixing; this prevents lumps and improves texture in your Tiramisu Balls.
-
Quick Dips Only: Avoid over-soaking the ladyfingers in coffee. A quick dip preserves their structure and prevents your Tiramisu Balls from becoming overly soggy.
-
Chill Thoroughly: Allow your mascarpone mixture and shaped Tiramisu Balls to chill adequately. Proper cooling ensures the right consistency and enhances flavors.
-
Quality Ingredients: Use high-quality mascarpone and real vanilla extract for the best flavor. These small details can elevate your Tiramisu Balls to gourmet status.
-
Add Optional Flavors: Experiment with variations, like incorporating orange juice instead of coffee for a refreshing twist on the traditional tiramisu flavor profile.
Tiramisu Balls Variations & Substitutions
Get creative with your Tiramisu Balls by trying out these fun and delicious twists that ooze flavor and excitement!
-
Citrus Twist: Soak ladyfingers in orange juice instead of coffee for a refreshing zing. The bright citrus notes will give your dessert a fabulous lift and make it perfect for warm days.
-
Mini Chocolate Chips: Fold in some mini chocolate chips into the mascarpone mixture for an extra burst of chocolate flavor. These little gems add delightful sweetness and texture in every bite!
-
Kid-Friendly: Use chocolate milk instead of coffee to create a kid-friendly version. This swap will not only eliminate the caffeine but also cater to little ones’ tastes while keeping the indulgence intact.
-
Nutty Delight: Add finely chopped nuts, like hazelnuts or almonds, to the mascarpone mixture for a satisfying crunch. The nutty flavor complements the creamy filling beautifully, making each bite even more enjoyable.
-
Coconut Flare: Incorporate shredded coconut into the mascarpone blend for a tropical touch. This variation will transport your taste buds to an island paradise as you savor the sweetness.
-
Spiced Up: Add a dash of cinnamon or nutmeg to the mascarpone mix for a hint of warm spice. Just a sprinkle will bring an enticing depth of flavor while complementing the chocolate and coffee beautifully.
-
Vegan Version: Substitute mascarpone with cashew cream and use coconut cream for whipping. For the best results, ensure all ingredients are plant-based for a delicious vegan treat that everyone will love!
-
Extra Creamy: For a richer texture, blend in a dollop of sour cream or Greek yogurt into the mascarpone mixture. The tang from these ingredients elevates the flavor profile, creating a creamy indulgence that feels luxurious.
Feel free to mix and match these ideas for your style, and remember: the joy of cooking comes from exploring new flavors! If you're looking for more fabulous dessert ideas, check out our Easy No-Bake Desserts.
What to Serve with Tiramisu Balls?
Indulging in Tiramisu Balls is a delightful way to satisfy your sweet cravings, and pairing them with the right accompaniments elevates your dessert experience.
- Fresh Berries: Juicy strawberries or raspberries add a refreshing tartness that beautifully balances the rich, creamy flavors of Tiramisu Balls.
- Espresso Shots: Bold and aromatic espresso complements the coffee flavor in the Tiramisu Balls, creating a truly authentic Italian dessert experience.
- Whipped Cream: Light and airy whipped cream can be dolloped on the side, providing a fluffy contrast and enhancing the dessert’s indulgent presentation.
- Chocolate-Covered Almonds: The crunch and slight bitterness of chocolate-covered almonds offer a delightful textural contrast to the softness of the Tiramisu Balls.
- Vanilla Ice Cream: Creamy vanilla ice cream serves as a perfect cold base to enjoy alongside the Tiramisu Balls, enhancing the dessert's richness while cooling your palate.
- Chocolate Sauce Drizzle: A drizzle of warm chocolate sauce not only intensifies the sweetness but also adds an elegant touch to your dessert platter.
- Mint Leaves Garnish: A sprinkle of fresh mint leaves brings a burst of color and a refreshing note that brightens the palate alongside indulgent flavors.
How to Store and Freeze Tiramisu Balls
Fridge: Store Tiramisu Balls in an airtight container for up to 3 days. This keeps them fresh while preserving their delightful texture and flavor.
Freezer: You can freeze Tiramisu Balls for up to 1 month. Place them in a single layer on a baking sheet until firm, then transfer to an airtight container or freeze bag to prevent sticking.
Thawing: To enjoy frozen Tiramisu Balls, thaw them in the refrigerator for a few hours or overnight. This gentle thaw maintains their creamy goodness.
Serving: After thawing, dust with additional cocoa powder for an extra touch before serving, ensuring they remain just as delightful as when freshly made!
Tiramisu Balls Recipe FAQs
What kind of mascarpone cheese should I use?
Absolutely! I recommend using high-quality mascarpone cheese for the richest flavor and best texture. Look for mascarpone that is fresh and creamy, as this will enhance the overall taste of your Tiramisu Balls. Avoid products that are overly processed, as they may lack the luxurious creaminess you're aiming for.
How should I store my Tiramisu Balls?
You can store Tiramisu Balls in an airtight container in the refrigerator for up to 3 days. Just make sure they are well-covered to keep them fresh and maintain their delightful texture. For best results, add a layer of parchment paper between layers to prevent sticking.
Can I freeze Tiramisu Balls?
Absolutely! You can freeze Tiramisu Balls for up to 1 month. To do this, place them in a single layer on a baking sheet until they become firm, then transfer them to an airtight container or a freezer bag to avoid sticking together. Just make sure to label and date the container for easy identification later!
What if my Tiramisu Balls are too soft and don’t hold their shape?
If your Tiramisu Balls are too soft, this could be due to insufficient chilling time or the mascarpone mixture being too warm. To fix this, simply place the mixture back in the refrigerator for another 30 minutes to an hour. If you find them still soft after forming the balls, try adding a bit more crushed ladyfinger to firm them up. Remember, a proper chill time is essential!
Are Tiramisu Balls suitable for kids?
Yes, they can be made kid-friendly! If you want to share Tiramisu Balls with little ones, simply skip the coffee liqueur and use chocolate milk or a non-caffeinated beverage to soak the ladyfingers. This way, they can enjoy the delicious flavors without the added caffeine.
How do I know when the heavy cream has been whipped to stiff peaks?
Whipping the cream properly is crucial for the texture of your Tiramisu Balls. You'll know it's at stiff peaks when you lift the beaters out of the bowl, and the cream holds its shape without drooping. This usually takes about 3 to 5 minutes on high speed, so keep an eye on it! If you start to see butter form, you've gone a little too far, so stop immediately.
Irresistibly Yum Tiramisu Balls for Easy Indulgence
Ingredients
Equipment
Method
- Start by pouring the heavy cream into a chilled mixing bowl. Using a hand mixer, whip the cream on medium-high speed for about 3 to 5 minutes, or until stiff peaks form.
- In a separate bowl, combine the room temperature mascarpone cheese with the sifted powdered sugar and blend until smooth.
- Add the vanilla extract and a pinch of salt to the mascarpone mixture. Mix well until thoroughly combined.
- Gently fold the whipped cream into the mascarpone mixture in three parts.
- Cover with plastic wrap and refrigerate for at least 30 minutes.
- Brew a strong cup of coffee and cool completely.
- If desired, stir in coffee liqueur to the cooled coffee.
- Dip each ladyfinger into the cooled coffee mixture quickly and place on a plate.
- Finely crush the soaked ladyfingers using a food processor.
- Add the crushed ladyfingers to the chilled mascarpone cream and fold until well combined.
- Cover and return to the refrigerator for at least 1 hour.
- Once chilled, scoop out the mixture and roll into 1-inch balls, placing them on parchment-lined tray.
- Roll each ball in cocoa powder until fully coated.
- Optionally, garnish with chocolate shavings or grated chocolate.
- Refrigerate the balls for at least another 30 minutes before serving.


Leave a Reply