
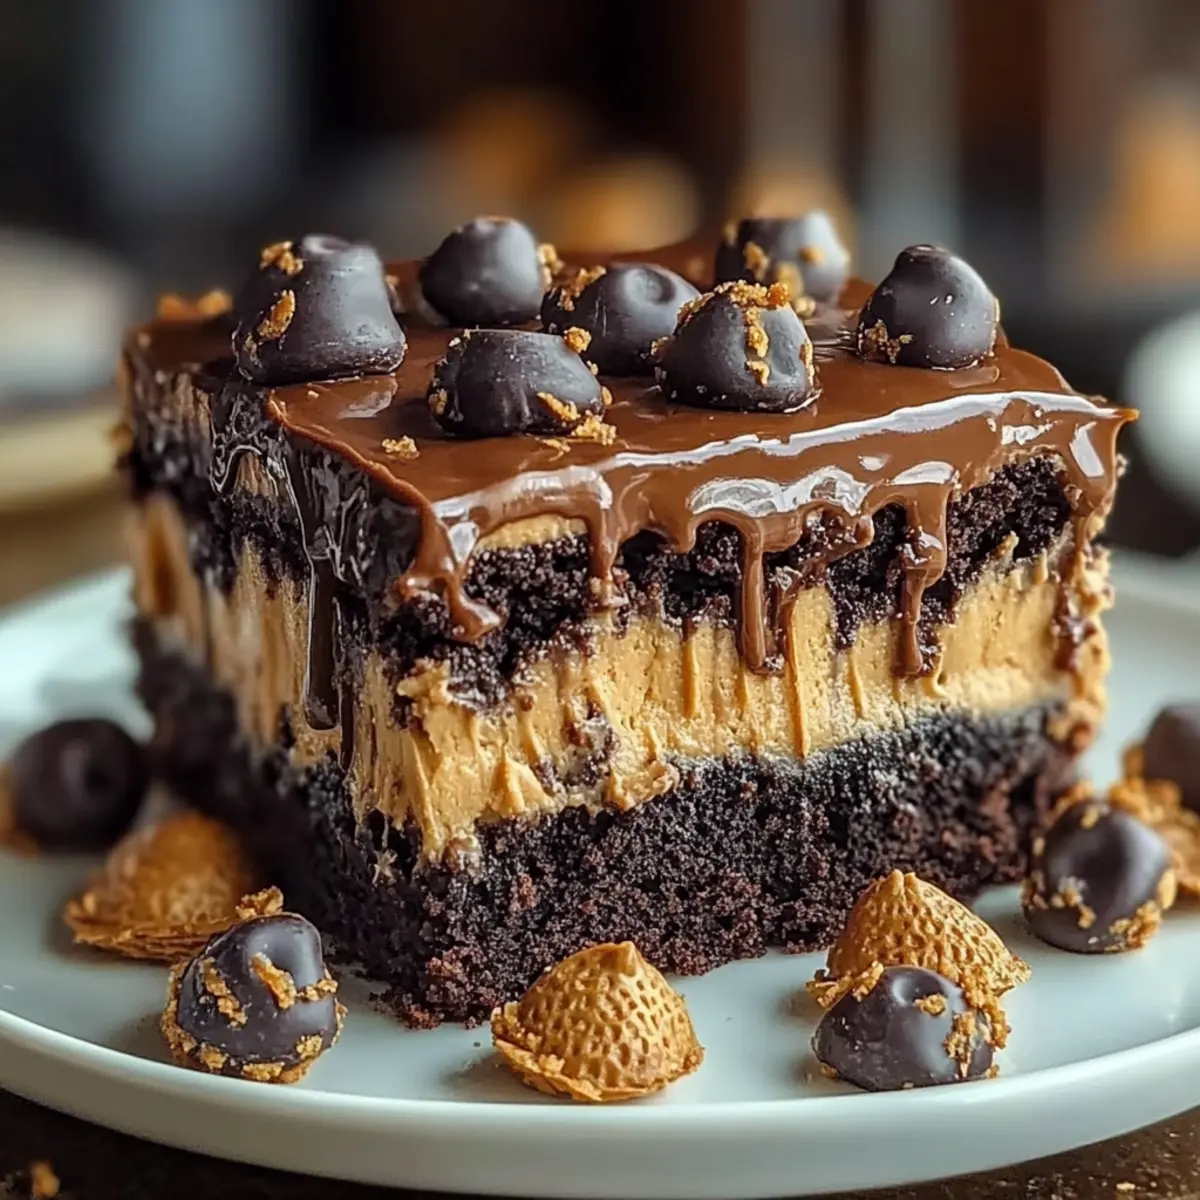
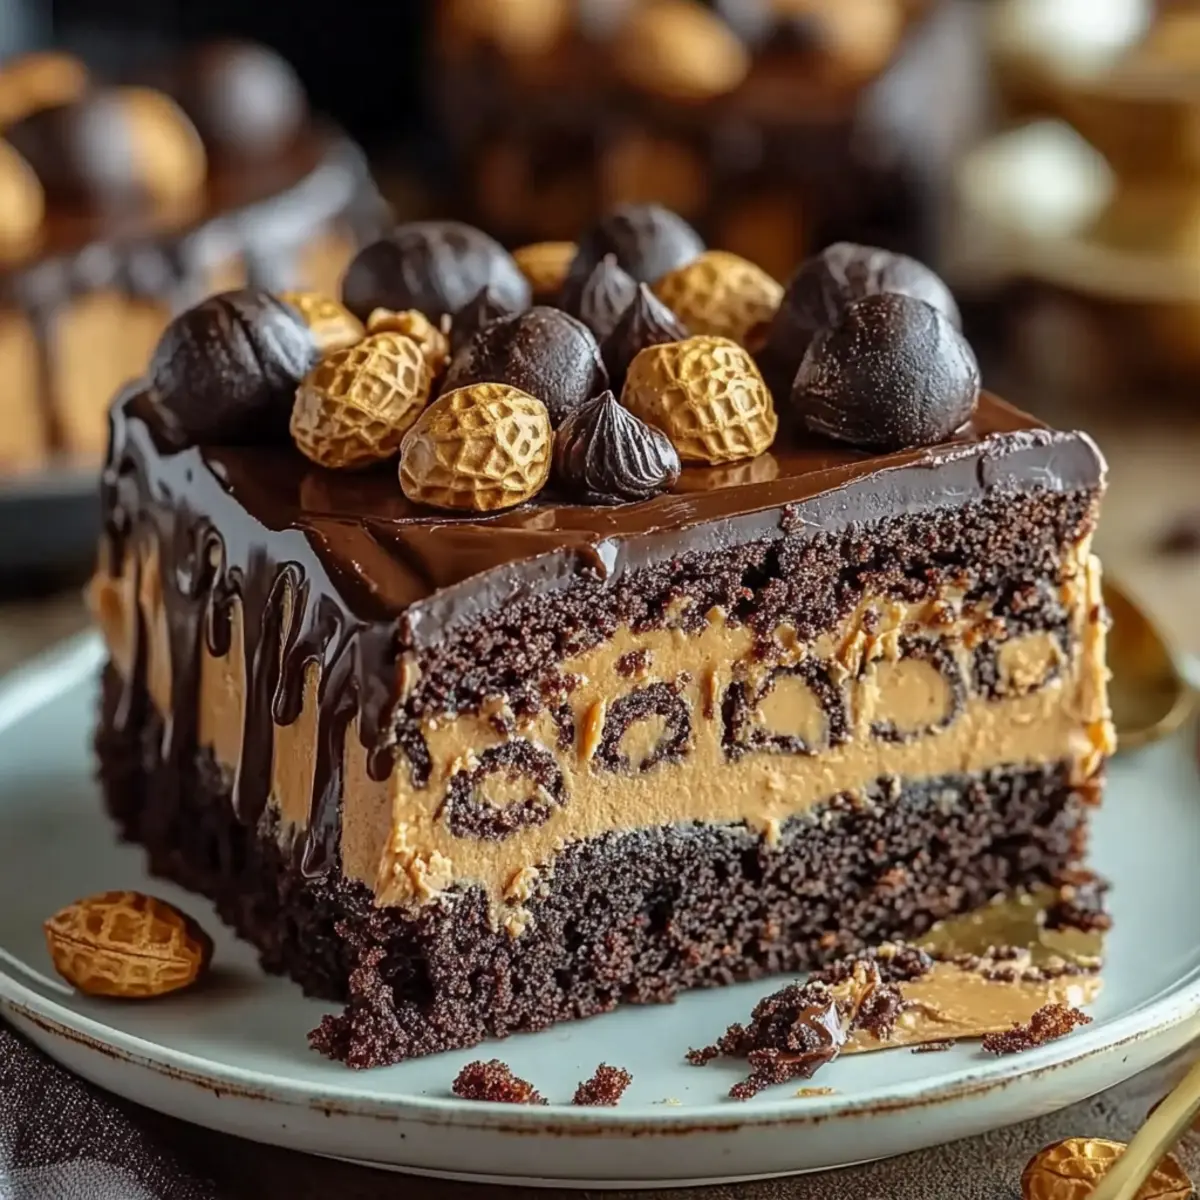
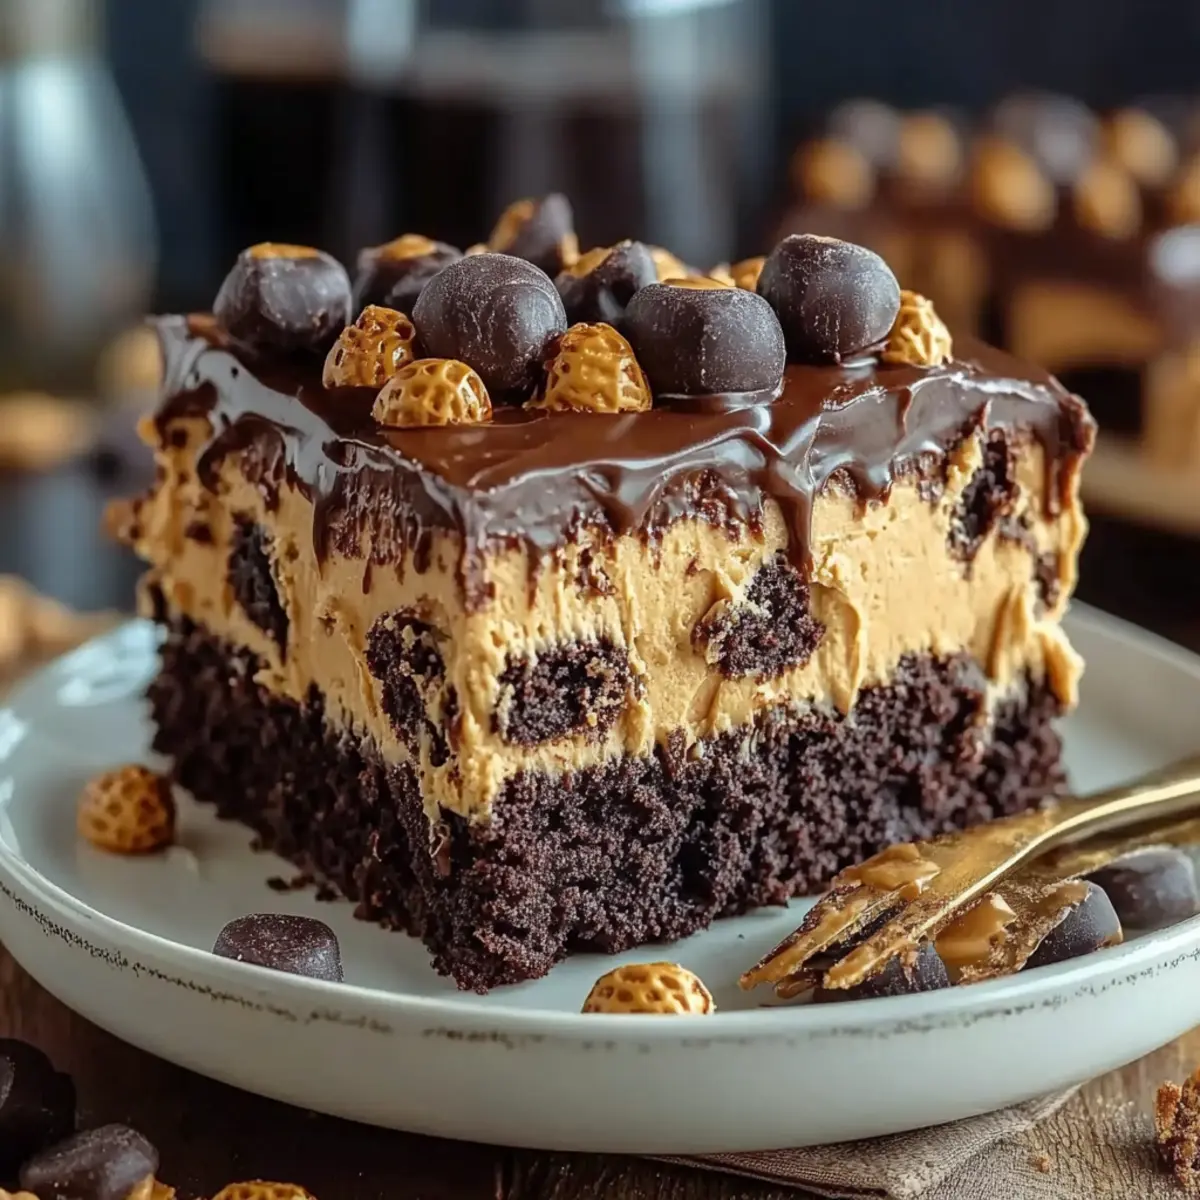
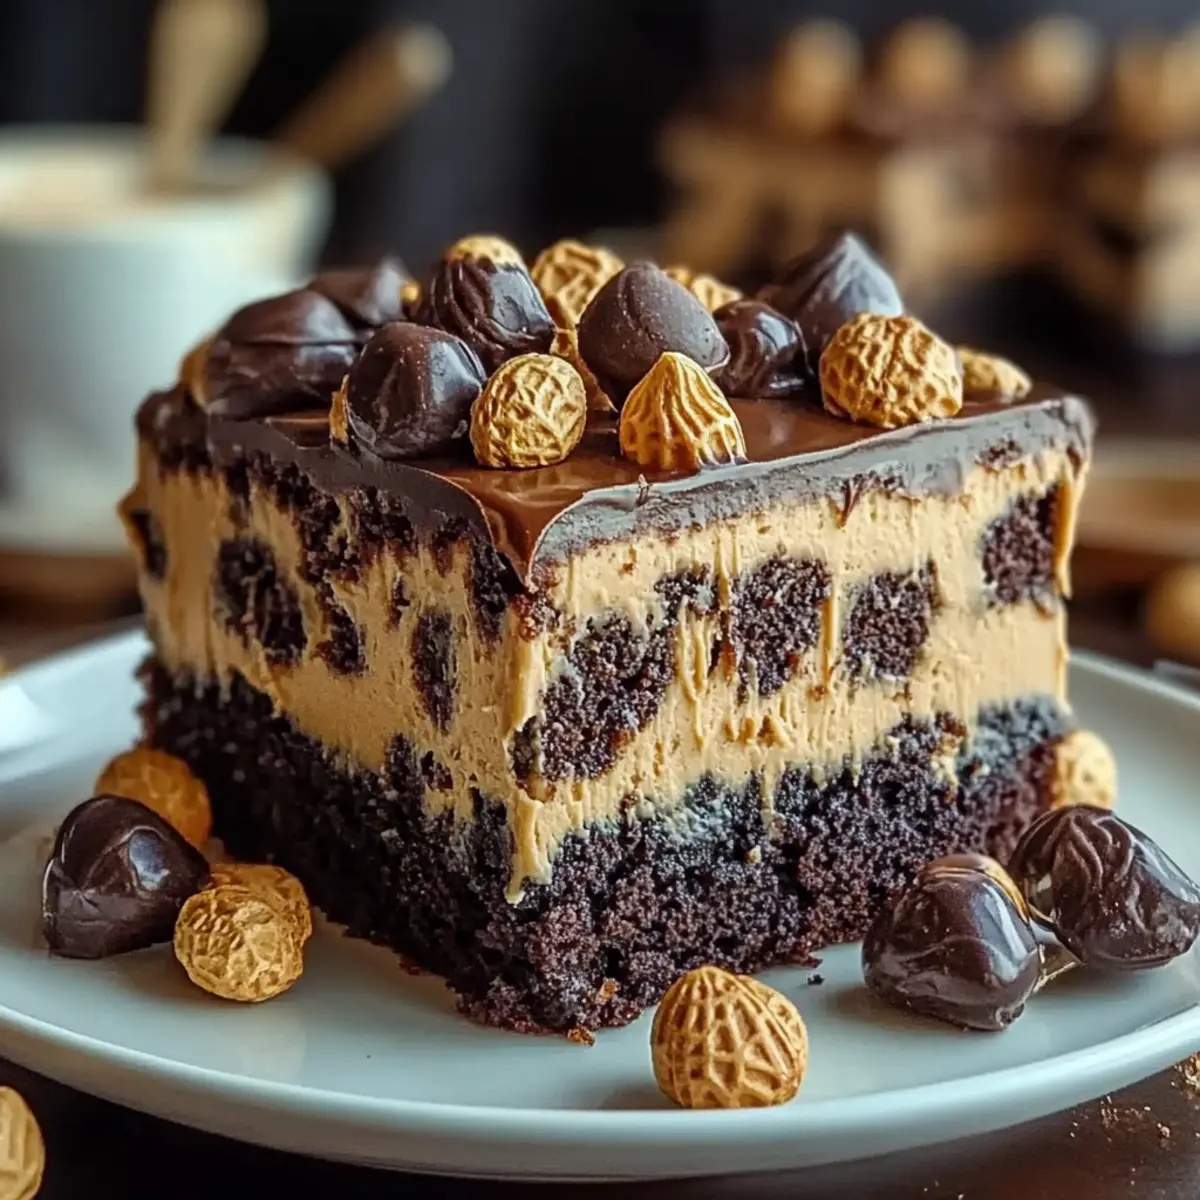
As I rummaged through my pantry one rainy afternoon, the idea for my Reese’s Peanut Butter Earthquake Cake hit me like a sweet revelation. This dessert is a delightful mashup of rich chocolate and creamy peanut butter, creating a tantalizing experience that’s not only visually stunning but also easy to whip up. Imagine your kitchen filled with the intoxicating aroma of baking chocolate while you create this masterpiece, perfect for impressing guests or simply treating yourself! With the ease of using a cake mix and the ability to customize it to your liking, this recipe promises a crowd-pleaser that will sideline your cravings for fast food and elevate your dessert game. Are you ready to dive into this chocolate-peanut butter paradise?
Why is this cake a must-try?
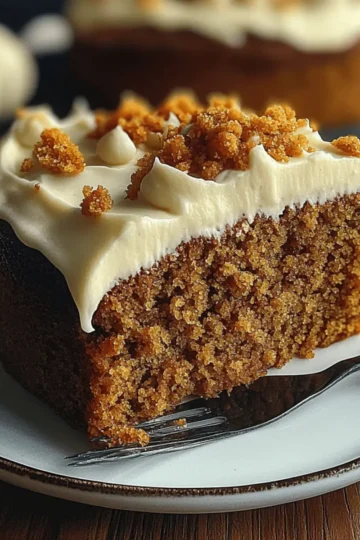
Decadent Layers: The Reese’s Peanut Butter Earthquake Cake features a stunning combination of fudgy chocolate and creamy peanut butter, ensuring each bite is a delicious adventure.
Crowd-Pleasing Delight: This cake is perfect for gatherings, tantalizing everyone’s taste buds with its irresistible flavors that will quickly make it the star of the dessert table.
Easily Customizable: Whether you want to switch in crunchy peanut butter or different kinds of chocolate cups, this recipe offers endless variations to cater to your preferences!
Quick and Simple: With the ease of using a cake mix, you’ll have this masterpiece in the oven in no time, allowing you to indulge in sweet satisfaction without the fuss.
Heavenly Aroma: As it bakes, your kitchen will be filled with an inviting scent that not only lifts your spirits but also whets your appetite for what's to come!
Perfect for Any Occasion: From birthday parties to cozy family dinners, this cake is a standout dessert that adds a touch of luxury to any gathering. Why not give it a try? You won't regret it!
Reeses Peanut Butter Earthquake Cake Ingredients
For the Cake
- Chocolate Cake Mix – Provides the base and richness; opt for a moist brand for the best results.
- Water – Hydrates the cake mix; swap for milk if you want extra creaminess.
- Vegetable Oil – Ensures a tender crumb and keeps the cake moist.
- Eggs – Acts as a binding agent; use room temperature eggs for full volume and fluffiness.
For the Peanut Butter Layer
- Creamy Peanut Butter – Adds flavor and creates the signature swirls; for a lighter option, go with natural peanut butter.
- Powdered Sugar – Sweetens the peanut butter layer, contributing to a creamy texture; feel free to substitute with coconut sugar for a healthier alternative.
- Cream Cheese – Provides richness and helps stabilize the peanut butter swirl; you can use light cream cheese for fewer calories.
- Butter – Adds moisture and rich flavor; margarine can be used if necessary.
- Vanilla Extract – Enhances flavor throughout the cake; stick with pure extract for authenticity.
For the Finishing Touches
- Hot Fudge Topping – Provides a decadent finish; opt for homemade fudge or a lower-sugar version from the store.
- Reese's Peanut Butter Cups – Offers chunks of chocolatey-peanut butter goodness throughout; feel free to use any chocolate cup, but keep in mind it may slightly change the flavor profile.
This Reese's Peanut Butter Earthquake Cake promises to deliver an unforgettable dessert experience that elevates your baking game!
Step‑by‑Step Instructions for Reeses Peanut Butter Earthquake Cake
Step 1: Preheat and Prepare
Begin by preheating your oven to 350°F (175°C). While the oven heats up, take a 9x13 inch baking pan and generously grease it with butter or non-stick spray. This will ensure your Reese’s Peanut Butter Earthquake Cake releases easily once baked. Set the prepared pan aside, ready for the luscious batter.
Step 2: Mix the Cake Batter
In a large mixing bowl, combine the chocolate cake mix, water, vegetable oil, and eggs. Using an electric mixer, beat the mixture on medium speed for about 2 minutes until it’s smooth and well blended, with no dry lumps remaining. The batter should have a glossy appearance, indicating it’s well combined and ready to be poured into the pan.
Step 3: Pour Batter into Pan
Carefully pour the rich chocolate batter into your greased baking pan, spreading it evenly with a spatula to ensure a consistent layer. This will form the decadent base of your Reese’s Peanut Butter Earthquake Cake. Give the pan a gentle tap on the counter to release any air bubbles and help the batter settle nicely.
Step 4: Prepare the Peanut Butter Mixture
In a separate bowl, beat together the creamy peanut butter, powdered sugar, cream cheese, softened butter, and vanilla extract using an electric mixer. Mix on medium speed until the mixture becomes smooth and creamy. This will create a delightful peanut butter layer that swirls beautifully into the cake, adding a delicious richness.
Step 5: Swirl the Peanut Butter Layer
Drop spoonfuls of the creamy peanut butter mixture randomly over the chocolate batter in the pan. Using a butter knife or a skewer, gently swirl the peanut butter into the chocolate layer to create a beautiful marbled effect. Be careful not to fully mix them together; you want to maintain distinct pockets of peanut butter throughout the cake.
Step 6: Bake the Cake
Place the pan in the preheated oven and bake for 35 to 40 minutes, or until a skewer inserted into the center comes out with moist crumbs. The edge should look firm and set, while the center appears slightly soft—this is crucial for that molten effect. Keep an eye on the time as ovens can vary!
Step 7: Cool Completely
Once baked, remove your Reese’s Peanut Butter Earthquake Cake from the oven and let it cool completely in the pan on a wire rack. This step is vital for allowing all those flavors to meld together and for the cake to set properly, ensuring it slices neatly later on.
Step 8: Add the Fudge Topping
After the cake has completely cooled, warm up the hot fudge topping in the microwave for about 15-20 seconds until runny. Pour the warm fudge generously over the cooled cake, letting it cascade down the sides and create a delectable finish that enhances the overall indulgence of the dessert.
Step 9: Garnish with Reese's Cups
To elevate your creation, chop the Reese's Peanut Butter Cups into smaller pieces and sprinkle them generously over the fudge topping while it's still warm. This not only adds texture but also enhances the chocolate-peanut butter flavor profile that your Earthquake Cake promises.
Step 10: Slice and Serve
Allow the cake to set for a short while, then use a sharp knife to slice it into squares. Serve warm or at room temperature, keeping in mind the chocolate-peanut butter gooeyness within. Your Reese's Peanut Butter Earthquake Cake is ready to be the star of your dessert table!
Reeses Peanut Butter Earthquake Cake Variations
Feel free to let your creativity shine and customize this dessert just the way you adore!
-
Crunchy Twist: Substitute creamy peanut butter with crunchy for a delightful texture boost, adding a satisfying crunch in every bite.
-
Dark Chocolate Delight: Switch to dark chocolate cake mix instead of regular for a rich, decadent flavor and an extra dose of sophistication.
-
Sugar-Free Option: Use sugar-free chocolate cake mix and sugar alternatives in the peanut butter layer for a guilt-free indulgence without sacrificing taste.
-
Nutty Layers: Add chopped nuts into the peanut butter layer for a delicious mix of flavor and crunch that complements the gooey chocolate beautifully.
-
Vegan Version: Replace eggs with flaxseed meal and use almond milk instead of water; switch to a dairy-free butter substitute for a plant-based treat everyone can enjoy!
-
Fruity Fun: Mix in some fresh raspberries or strawberries into the batter before baking. Their tartness contrasts beautifully with the rich chocolate and creamy peanut butter.
-
Spicy Chocolate: Add a pinch of cayenne pepper or chili powder to the chocolate batter to invigorate the flavor profile and excite your taste buds.
-
Distinctive Toppings: Experiment by topping the warm cake with an array of garnishes like whipped coconut cream or caramel drizzle for a unique finishing touch that takes it over the top!
Each of these variations allows you to explore countless options while enjoying your Reese’s Peanut Butter Earthquake Cake. Don’t hesitate to mix and match elements or try a few different combinations. The journey of flavors is half the fun!
Expert Tips for Reese’s Peanut Butter Earthquake Cake
- Room Temperature Ingredients: Ensure eggs and dairy are at room temperature for better mixing and texture, which enhances the overall flavor of your Reese’s Peanut Butter Earthquake Cake.
- Don't Overmix: Mix the batter just until combined to avoid a dense cake. Overmixing can alter the delightful texture you want in this heavenly dessert.
- Perfect Swirling Technique: Drop spoonfuls of the peanut butter mixture carefully to create visible pockets. Swirl gently; avoid fully blending to maintain those delicious peanut butter pockets.
- Check for Doneness: Use a skewer to test the cake—it should come out with moist crumbs, ensuring that molten fudge effect in each slice.
- Add Personal Touches: Feel free to experiment with substitutions, like using crunchy peanut butter or alternative chocolate cups, for a unique twist on this classic recipe.
How to Store and Freeze Reese’s Peanut Butter Earthquake Cake
Fridge: Store the cake in an airtight container for up to 3 days to maintain its moist texture. This way, you can enjoy the rich chocolate and peanut butter flavors at any time!
Freezer: For long-term storage, wrap slices of the cooled cake tightly in plastic wrap and then place them in a freezer-safe bag. It can last for up to 3 months without losing its decadent taste.
Reheating: When you're ready to enjoy the cake again, simply thaw in the refrigerator overnight. Reheat individual slices in the microwave for 10-15 seconds to bring back that warm, gooey center!
Serving Tip: For an extra indulgent treat, top warm slices with a bit more hot fudge or a scoop of vanilla ice cream when serving.
Make Ahead Options
These Reese’s Peanut Butter Earthquake Cake is perfect for busy home cooks looking to save time! You can prepare the chocolate cake batter up to 24 hours in advance; simply store it in an airtight container in the refrigerator to maintain its moisture. Additionally, the peanut butter layer can be mixed ahead and refrigerated for up to 3 days—just give it a quick stir before using. When you're ready to bake, pour the chilled batter into the prepared pan, drop spoonfuls of the peanut butter mixture, and swirl as usual. This prep-ahead approach not only saves you time on busy weeknights but also allows the flavors to meld beautifully for a cake that is just as delicious as when made fresh!
What to Serve with Reese’s Peanut Butter Earthquake Cake
Enhance your dessert experience with delicious pairings that balance the rich flavors and textures of this indulgent cake.
-
Vanilla Ice Cream: The creamy, cold contrast to the warm cake creates a delightful contrast, making every bite a heavenly sensation.
-
Whipped Cream: Light and airy, a dollop adds a touch of sweetness that complements the rich chocolate and peanut butter beautifully.
-
Fresh Berries: Strawberries or raspberries provide a tart, refreshing note that cuts through the sweetness, offering a well-rounded dessert experience.
-
Chocolate Sauce: Drizzling extra chocolate sauce over each slice takes the decadence to new heights, perfect for true chocolate lovers.
-
Coffee or Espresso: A warm cup of coffee enhances the flavors of the cake, providing an inviting warmth that pairs exquisitely with the dessert.
-
Nutty Granola: Sprinkling some granola on top adds an extra crunch and a nutty flavor that pairs delightfully with the creamy elements of the cake.
-
Milk: A classic companion, a glass of cold milk serves as the perfect drink to wash down every rich bite of your Reese's Peanut Butter Earthquake Cake.
Reese’s Peanut Butter Earthquake Cake Recipe FAQs
What kind of chocolate cake mix should I use?
I recommend using a moist chocolate cake mix for the best results. Look for brands that boast a rich texture. If you want to elevate the decadence, consider using a devil's food cake mix—it provides an even deeper chocolate flavor!
How should I store leftover cake?
Store leftover Reese’s Peanut Butter Earthquake Cake in an airtight container in the refrigerator. It should stay fresh for up to 3 days. You can enjoy it chilled or warm it up in the microwave for a comforting dessert experience!
Can I freeze this cake?
Absolutely! To freeze, wrap individual slices tightly in plastic wrap and then place them in a freezer-safe bag or container. This method will keep it good for up to 3 months. When you’re ready to eat, simply thaw overnight in the fridge, then reheat slices in the microwave for about 10-15 seconds to revive that gooey texture.
What should I do if my cake is too dense?
If you find your Reese’s Peanut Butter Earthquake Cake is denser than expected, it may be due to overmixing. Be sure to mix your batter just until combined and to use room temperature eggs, as this can improve the cake's texture. For next time, check that you don’t overbeat the batter, and it should rise beautifully!
Is there a nut-free option for this recipe?
Yes, you can easily modify this recipe to be nut-free by using sunbutter or a nut-free chocolate spread instead of peanut butter. Always check for any possible cross-contamination if allergies are a concern, especially with ingredients like chocolate cups.
How can I enhance the flavors in this cake?
For an extra flavor boost, consider adding a teaspoon of espresso powder to the chocolate batter—it intensifies the chocolate flavor without adding coffee taste! Adding a pinch of salt can also enhance the sweetness and balance the flavors perfectly.
Indulgent Reese’s Peanut Butter Earthquake Cake You’ll Love
Ingredients
Equipment
Method
- Preheat your oven to 350°F (175°C) and grease a 9x13 inch baking pan.
- In a large mixing bowl, combine the chocolate cake mix, water, vegetable oil, and eggs. Beat on medium speed for about 2 minutes until smooth and glossy.
- Pour the chocolate batter into the prepared baking pan and spread evenly. Tap gently to release air bubbles.
- In a separate bowl, mix the creamy peanut butter, powdered sugar, cream cheese, butter, and vanilla until smooth.
- Spoon the peanut butter mixture over the chocolate batter and gently swirl with a knife or skewer.
- Bake for 35 to 40 minutes until a skewer comes out with moist crumbs. Let cool completely in the pan.
- Warm the hot fudge topping in the microwave for 15-20 seconds. Pour over the cooled cake.
- Chop the Reese's cups and sprinkle on top of the warm fudge.
- Slice into squares and serve warm or at room temperature.


Leave a Reply